Showing posts with label cosplay. Show all posts

Wednesday, August 31, 2016

Princess Serenity (Sailor Moon) Light Up Dress - Part II: The Sleeves


I know it may seem strange to break out the sleeves into their own post when I covered the entire dress construction in the previous post. My approach on writing is the time spent on parts and I spent DAYS constructing the sleeves. They deserve some time in the spotlight.

This is a three part series of how I constructed my Sailor Moon Crystal Princess Serenity Light Up Dress Cosplay.
Part I - The Dress
Part II - The Sleeves
Part III - The Overlay and Accessories (Coming Soon)

How did you cut your fabric?
Sewing circles is my enemy. I never like it and circles don't like me. My goal was to have sleeves that had a flat back for easy sewing, but a circle front I could puff out with some stuffing. I really liked the approach over at My Cute Bow for creating an elastic white band around your arm that you attach your sleeve puff to.

I made a circle with tails that I could overlap to sew together. See?

From finished cut to template
I created the circle template first to find my ideal puff size. After several drafts with paper towels, I determined how large the spirals/tails needed to be in order to overlap.

How did you do your loops?
Princess Serenity's sleeve design mimics a greek column scroll in all versions of the dress.


A popular cosplay approach is to roll the fabric into a ball to create the lines. This looks fabulous and adds depth to the sleeves. However, I wanted to stay closer to Sailor Moon Crystal which has gold scrolls. I tried painting the scrolls, but it looked flat. I even experimented with outlining the paint in metallic gold thread, but it wasn't the look I imaged. Break out the ribbon!

Fabric test with painted scrolls and start of thread outline. Not bad, but not what I was looking for.
I created a template scroll to lay the fabric over while I pinned the ribbon into place on the sleeves. The ribbon had wire in it; a big help to keep it holding shape. Then I would go back and sew the section. This way, I had less pins to prick me while I worked. It took one to two hours to lay and sew each scroll.
Ribbon attached to the circle finally!
How did you get the lights to only show on the gold scrolls?
My original plan was to have no lights in the sleeves. Once you start adding lights, you want more. I remember from light tests with the front circles (boob circles as some friends called them) that craft foam would block light.
My Serenity foam piece to block light in unwanted places.


Like a crazy pumpkin pattern, I cut the scroll pattern out of the foam pieces. To check the cut, I would pin the foam to the sleeve and shine a light through the bottom. A glass coffee table was very handy for this process.
Foam is pinned into place to make sure the cuts are the correct width before gluing down.
How would I attach this without showing? Turns out that E600, when applied in light layers, does not show like hot glue. The foam piece is enclosed already with no where to go. I only needed enough stick to hold it in place. This part took around one hour per sleeve.

What lights did you use?
I had plenty of white fairy lights left from my front piece. I cut stripes for each sleeve front that contained 4 lights I could bury in the stuffing.

A few led lights rolled into a circle. Ready to go in the sleeves!
 It was important to not put the lights right up against the scrolls to avoid uneven lighting. The stuffing it helps to diffuse the glow evenly across the entire scroll. Each scroll is independent so there are four lights per scroll for a total of 16 lights across the sleeves

Light it up! Sleeves with lit golden scrolls
How are you powering that?!
Thank the cosplay gods for that Sailor Moon Crystal sleeve design! In Crystal, you can see you have two circles, front and back, with a rectangle connecting the two pieces. The rectangle even folds out a bit and has little flaps! I created a pouch between the two circles that the batter could live in. A two coin cell battery holder powers each sleeve.

Sleeve before covering up the battery. I sewed a pocket to help keep things in place.


What would you have done differently?
Glue!! I was afraid to glue the ribbon down because I thought it would show in the lights. I did some testing with glue towards the end and noticed it did not show though. I could have been using it the whole time. Test early and test often.

I also should have done more to insulate my solder points. The tails on the circle allow me to only undo a few stitches to get into the electrical wiring. A good call in hindsight as I had to go into one scroll twice for repairs.

That's it for part II! I'll wrap up the final post after Dragon Con.

Friday, August 19, 2016

Princess Serenity (Sailor Moon) Cosplay Light Up Dress - Part I

Princess serenity light up dress coplay tutorial


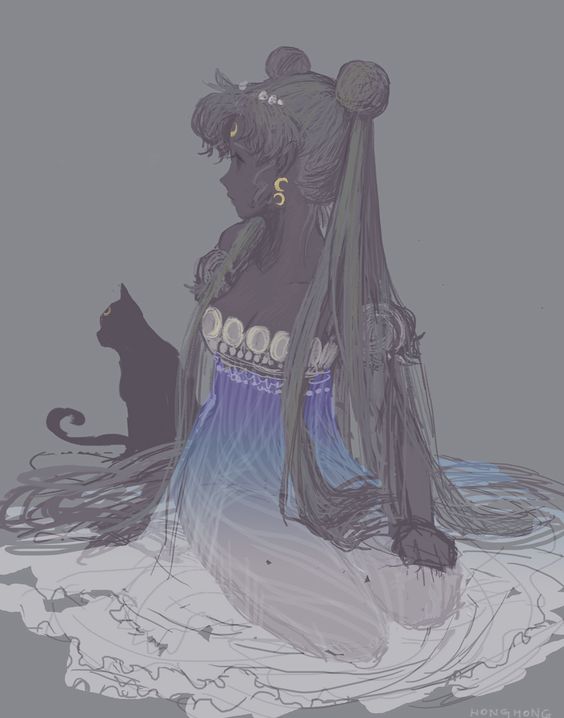
I'm a strong believer in quality over quantity, which is why I'm a one-cosplay-a-year kind of gal.  I knew I wanted more electronics in my next project, but was lacking inspiration. Then I saw the piece of Sailor Moon fan art.
sailor moon fan art blues

 I was captivated by the color in it. I knew what I wanted: to recreate those soft hues in lights.  I was also inspired to flip it thanks to this piece of fan art by Keah. It took six months from concept to completion. Here's where I ended up (view the rest on my DeviantArt page):


This is a three part series of how I constructed my Sailor Moon Crystal Princess Serenity Light Up Dress Cosplay.
Part I - The Dress
Part II - The Sleeves
Part III - The Overlay and Accessories (Coming Soon)

What was your dress pattern?

The good news is that Serenity's dress is a very simple pattern. The bad news is I was struggling to find a version with minimum modifications. Lucky for me Sailor Crafty has a great article on how she made her NeoQueen Serenity dress that includes her pattern number.  THANK YOU!


NeoQueen Serenity's dress is more of a silhouette than Princess Serenity's empire waist ballgown, so I added two panels up front to give it flow. The train in the back is cut short to keep my lights off the floor. Also, I bet I would trip a bunch on it.
The triangles were my two additional panels
The fabric is a heavier weight, non-stretch cotton to help support the weight of the lights. Admittedly, I was still working on those logistics but I knew light fabric would likely sag in the wrong places.

What lights did you use?

I had two guiding principles for this cosplay:
1) It must good with the lights on or off
2) The lights must be visible in daylight and evening

Principle number one is a topic for part III. Principle number two meant a lot of light tests. My first thought was NeoPixels by AdaFruit.  I ordered a Gemma starter pack to play with the lights.

The NeoPixels were amazing! They are bright! They can be any color! They are easy to program! But they are expensive and they can be hot to the touch. I needed something requiring less money and skill.


Left side:fairy light test; Right side: Neopixel test

Christmas lights! That's cheap and already on a string! Amazon yielded few results for battery powered christmas lights but they did have lots of 'fairy lights'. They're small LED lights on copper wire and often are battery powered. I ordered a pack to test -- Winner!
fairy lights white
Typical 'fairy lights' - 7-10ft with a battery pack
The lower dress is composed of 28 feet of led lights - 14 ft blue and 14ft of purple. Total light cost was under $30.
I did have to solder together 2 packs of each lights and redo the solder points already on the strand. All solder points were coated in clear nail polish to prevent shorts from the wires touching. The light strings were soldered to an AdaFruit Gemma to regulate voltage  and provide an on/off switch. (Yes, a gemma is overkill for those functions. No, I don't care because it was simple.)
Light repairs with the help of my dad.
I used alligator clips for a very long time to make sure everything was right. 

How did you get the lights in the dress?

I flipped the fan art to have the lights 'trickling down' from the middle of the dress and exploding at the bottom. The new design would allow for me to load batteries at the bottom of the dress for easier placement and access while I'm in it.


 I laid out the bottom half and sketched my lights outline with a fabric pen. Then I pinned the final lines I liked the most.

The right side shows where I sketched my light lines.
The left is the first string of blue lights pulled through. 
Electronics are fickle. If I sewed the lights on, I would have to remove and restitch every time there was an issue. (There were a lot of issues at first). The solution was a combination of fabric tubes and ribbon that I could run the lights through. I used tubes for the first line to hold the lights up, then progressed to ribbon hooks for lower levels, and ended with sheer ribbon for the very bottom.
Unlit dress showing the light support system.
The purple lights are the ones encased in shear ribbon. Being on the bottom, I was afraid of snag and wanted to protect them more. The ribbon does it job perfectly but it was very difficult to string the lights through because I didn't provide enough gaps to pull the lights.

Two strings of lights in!
All the lights in and on!
Where did you hide the power for all this?
Like I mentioned above, the light strings were soldered to an AdaFruit Gemma to regulate voltage to 3volts and provide an on/off switch. Here's what that looks like sewn into the dress.


The velcro is the strip of fabric I use to cover and protect the gemma. By having all the wires hook up to this one gemma, I can connect a battery via jst or a micro-usb. The battery pack sits in the pouch sewn in below the gemma. 

I purchased a li-poly 2500mAh battery on my favorite site for power. 


And the rest of the dress....?
The rest is very straightforward. I sewed the top and the lining according to the directions. I did add more boning than the original pattern (six pieces instead of four) to prevent the front from collapsing. The real story for the rest of the dress comes in part III where I cover the beading and chiffon overlay.

Dress base complete!
What issues would you avoid your second time?
I spent two months researching and testing before I started to build. That wasn't an issue, but not needing that much R&D would make this project go faster!

I would use more fabric tubes and less ribbon to support my lights. I had enough dress scrap to make more, yet I hesitated to cut it in case I made a bigger oops.

The top of the dress kept concaving in after I placed all the beads on. My sister*, a textiles major, quickly pointed out I needed more boning. I wish I placed that additional boning in before I did beading and my liner.

My lights kept shorting at the start, which was really frustrating. My dad*, an electrical engineer, quickly pointed out that my wires at the solder points were touching and causing the short. Clear nailpolish is working, but I wish I had smaller heat shrink.

*Never underestimate the good advice of friends and family when working on a cosplay, regardless of their cosplay level or participation.


Final dress with lights on, minus the chiffon overlay.


Thanks for your interest! Don't forget to come back for parts II and III for the rest of build!


Sunday, July 10, 2016

Light it up! - Color changing wig flower for Princess Serenity

Blogging has taken a back-seat to cosplay construction this spring. I have a lofty goal of completing my Princesss Serenity cosplay (that fully lights up) by July 1. I'm a few days from goal and feeling on-track enough to take a break to blog a bit about it.

I hope to cover all aspects of this dress creation, but for now I'm starting with the simplest part. Sailor Moon's Princess Serenity often has a flower in her hair in manga and fan art. I wanted lots of lights and saw the flower as another opportunity.

Project Materials used:
Supplies needed:
  • Alligator clips
  • Soldering iron
  • Solder
  • Vice
  • Wire cutter
  • Wire stripper

New to electronics? I got my gear from Adafruit in Ladyada's Electronics Toolkit. Gave me everything I need for a great price.

The Build
Essentially, I sewed a neopixel attached to a Gemma into a flower. I'm not an electronics expert so I'm going to drop yet another link back to Adafruit. To learn all about neopixels, read their full guide.

I started by hooking up my gemma and neopixel via clips to work out the coding on the lights.

Wires everywhere! The neopixel hooked up to the gemma.

There's plenty of resource code in the Arduino library for color changing. I had to work out (with the help of my computer science husband) what colors I wanted to cycle and how fast to cycle them. I went with a six color rotation: blue, pink, purple, green, orange, white. Each color stays for around 5-7 second before taking another 5 seconds to shift to the next color.

The colors and timing is completely by feel. I spent around an hour tweaking both until I had a combination that I liked. I wanted it to shift fast enough that someone passing by would see the change, but slow enough that it doesn't look like a rave on my head. 


Flower color and placement testing.

Next, I started to sew/pin things into place. I knew I wanted the gemma on an outside petal so I could easily turn it on/off. The neopixel placement required more finesse. It can't go directly in the middle and shot out as that would just blind people. I conclude to put it towards the 'bottom' of the flower and shoot up through the petals. I sewed and cut the inside petals into better positions for the light. 

With positions marked, I took it all apart to solder the neopixel and gemma together. I ran the wire from my marked positions to get an idea for length, then added an inch. I don't want the wire too tight; I want it to flow.  


Flower with neopixel sewn in and gemma outside. Those are the thin, flexible wires from Adafruit.

The perk of using gemma and neopixels is that they are made for wearables, so you have these large pads you can sew though. I sewed the gemma and neopixel into place using the holes I did not solder. 

Gemma - sewable and small!

The gemma unit is on the 'top' of the flower. To hold down the petal hiding it, I used a small strip of velcro. The neopixel sits on the bottom of the flower. The wire to the pixel is all white so I can run it through the flower petals without bring attention to it. It meant for keeping careful track of things when soldering!


Wig Attachment

I feel like it's cheating on a Usagi wig as I knew I had buns that I could wrap the unit around. Another cheat was a lot of fan art with pearls wrapped around the buns. My theory was to make the flower a chain in a bracelet. I would hide a side release buckle behind smaller flowers to allow the unit to clip around the bun. 

The hair bracelet is embroidery floss with pearls and two small pink flowers, each near the larger white flower. One of the pink flowers hides the buckle I use to snap it in place.

My original plan was to make the battery unit a part of the bracelet with more flowers hiding it. However, I underestimated the weight of the coin batteries and had to make it a separate piece (but still attached because of wires and power - duh!)

I glued two more pink flowers on the top of coin battery pack to disguise it, then did a sew/glue combo on the bottom to attach a hair clip. The batteries now clip into my hair as extra decoration.

From the back, battery pack  helps to hide my natural hair color while powering the flower. 
The final result is a hairpiece that is sure to light up the night!


Saturday, May 14, 2016

Expanding Foam and You: Wrap it up

After a long break due to events season, I am back in the blogger seat. I'm breaking my rhythm to start with a cosplaying blog to wrap up my expanding foam cliff hanger. As we've learned, a lot of this project is based on feel. There is not a formula for how much to carve or where to paint. I can only hope to provide tips to help.

When we last left off, I had finished carving the staff and wrapped it in masking tape. (You can catch up with part one and part two.) We are only losing detail from this step forward so work hard to retain what you have.
When wrapping the staff in tape, make sure to use smaller pieces to help you retain that detail you have carved in. Take your time with this step! Push it into your gaps and massage the tape around the edges.


mage staff - paper mache form
Half tape -- Half paper mache staff

When you finish wrapping the foam in tape, then you start to cover it in paper mache. Same rules-- use smaller pieces when necessary, push into gaps, and massage around edges to keep the rounded and pointed details. I used good ol' fashion newsprint and watered down some elmer's school glue for this step. The final product was one layer of tape and two layers of paper mache.

mage staff - paper mache form


Let your staff dry between each layer. Especially let it dry after your final layer. Paint and wet glue mix poorly. 

** Here is where I skipped a step the professionals do. I did not cover the paper mache layer in something like clay to smooth the project out. Depending on your time, budget, and level of scrutiny, you may want to add that step in.

I spent my drying time buying multiple shades of brown to get started -- dark brown, light brown, normal brown, tan, cooper. The first layer of paint was brown everywhere to give it a base. 


After that, most the staff received a second layer of brown because the newsprint was still showing through. But after that I got into using the different colors. Working with slightly wet paint on the second layer helped me blend in other colors, especially the lighter ones. 


The final finished product! I was very proud of how it turned out.  From a distance and even a conversational distance, it is hard to tell this is made from foam and paper mache. Up close with a LOT of light, you can see the outline of the strips of newspaper. For my use though, it works great!

mage wizard staff complete - final form


Missed a part? Go back and read:
Part 1 - Foam Art
Part 2 - The Carving


Wednesday, March 9, 2016

Expanding foam and You: The Carving


Welcome back! To recap, I covered how I created my expanding foam monstrosity in part one.  Now we go on to what I found to be the fun part-- carving the staff out!
expanding foam mage staff part 2

Here's what I had to start with. A large and in charge piece of foam that looks like a horror show.
uncarved mage staff with no shape - becomes white mage staff all from expanding foam


This is a messy process. Be sure to lay down a well anchored tarp to control your shavings as your cut foam off. You can see the start of my work at the bottom of the staff where it is smoother than the rest.

This is also a risky process because you are working with sharp blades.  Using Kami Cosplay's example, I used a box cutter to widdle it down.  She used a cutter with some weight but I really preferred the lighter and cheaper version. You want a sharp blade, which also made the cheaper cutter easier to work with and then discard as it dulled.
box cutter for expanding foam mage staff
This is a whole $1 at home depot.
I've had knife accidents before so I was careful to ALWAYS carve away from myself, not towards me. It is too easy to slip up and slice yourself.

I would gradually bring the staff down the size. My first go around was taking off the first quarter to half inch to start to see the shape of the staff. I continued to do a pass through from top to bottom, taking off 1/4 to 1/2 inch each time. By the third pass, some areas lost more and others lost less as I worked out the thickness. My vision was to have a skinny bottom that expanded into a thicker head.

For the divots and dips, I used sharpies to draw out where I wanted dips to be. As long as I could see the sharpie, the dip wasn't deep enough.

drawing details on foam for mage staff


I messed up several times, but you'll see later those errors added character to make the piece look more natural. If I really messed up, would stuff discarded foam into a gap.


Remember in my first post where I glued green foam to the staff? You can see it showing through as the green lines running up the staff. When I hit the foam, I knew I was 1 inch away from the wooden center and need to slow down the shaving. It also helped me gage circumference. I cut down and into the foam at the bottom of the staff but barely scraped it at the top.

The final step was to shaved off a bit more than I wanted because it will be getting covered in paper mache to bulk it back up.


To celebrate being done with carving, I covered the staff in masking tape to prep it for part three - painting. Be sure to really pressed the tape in and around the staff, otherwise you lose those details you made.

Smooth tapped up staff. 

Part 3 will be our final segment. I'll cover the prep and painting of the staff for the final outcome.

** This is a multiple-post article on creating a mage staff for a final fantasy white mage out of expanding foam.  Be sure to catch them all pokemon style!**

Tuesday, February 9, 2016

Expanding Foam and You: Creating a Mage Staff with Expanding Foam

Do you sense a theme with my latest cosplay posts? That would be prop making. I like to pick one things I want to learn that year and commit to making cosplays that help me learn it. Last year, it was props so I can now share what I have learned with the masses!

expanding foam cosplay mage staff how to


My big prop last year (literally!) was a mage's staff. After lots of research, the best material choice for me to follow my three tenets of prop making was going to be expanding foam. Two tutorials sold me on the idea:

Each project is different so while these served as good guides for me, I still ran into unique issues I had to battle. 

I nailed the first step to create my prop core and outline. 

I got a wood pole from Home Depot to serve as the core for the staff and drew a lot on a piece of craft foam until I found the approximate size and shape of the staff head. I would constantly hold the piece up to myself in a mirror to ensure I liked the scale. (Note: There are a lot of tutorials about using a lot of math to scale props online. At the end of the day, I go with what looks right on me.)


 I went outside with a tarp to start step 2-- attaching foam to my core. 
expanding foam cosplay mage staff how to
Expanding foam should be handled with care. Lay down a tarp to protect surfaces and be sure to wear at gloves to protect your skin. Outside application is best for large amounts because you will want the ventilation. 

Look Ma! I even made some guides to 1) help give the foam something to attach to and 2) give me a stopping point in carving.
 From my handy dandy sketch, I knew I wanted the staff to have an approximately two inch diameter. I cut and hot glued on foam pieces that are two inches. When carving, if I saw green I would know I have gone far enough. 

You'll see most people use cardboard in other tutorials. I chose craft foam because it was easier for me to see and glue to my core. I was cutting a lot of pieces out and craft foam is way easier for that than cardboard. 

The expanding foam quickly rebelled against me. 
expanding foam cosplay mage staff how to
You see, it is very sticky when it meets cloth or plastic. It does not like to stick to itself after a certain point. The foam would start to build, then slide off the pole as it settled. After one bottle of foam, I was left with a half-covered mess of a staff. 

The solution was more cowbell and more guides. I hot glued craft foam everywhere to create 'V' channels the the foam could rest in.
expanding foam cosplay mage staff how to
Now I'm guessing you could also show more patience than me and wait for a smaller amount of foam to dry before applying the next.  However, this method totally worked. Sometimes I would jam a piece of craft foam between hunks of expanding foam - no glue needed. 

It still took several layers and some patience to create the necessary bulk on the staff.
expanding foam cosplay mage staff how to
The good thing about bright green guides is I knew to cover the staff until they were not visible. If I could see them or guess where they are, I would add more foam. 

It took between 3-4 bottles of foam to create the staff. Or rather the hunk of foam that would become the staff.  Next post will be about the carving and covering process!
expanding foam cosplay mage staff how to


Part II is live! Click here to ead the next steps.