Friday, February 26, 2016

Planning a Hiking Vacation: Family Edition

Last year's vacation was a first for us - we went on a hiking vacation with my family. Granted we're an older bunch with the youngest at 24 and we've vacationed with family before, but not like this. We never had to test our nerves together after miles of heat, blisters, and uphill and I was nervous. But I'm a planner at heart and I issued instructions as I tend to do with most things to help make it a better trip.


1) I was a drill sergeant about training
I brought up hiking training in every conversation. I would ask them how many miles they are walking each day, how many or how tall were the hills, and how winded they felt afterwards. I would make comparisons to landmarks they know ("Hiking up Highline trail will be like going up Kennesaw Mountain 3 times in a row.") so they could hopefully train more.  I started the training conversation before we even booked the flights. I didn't want anyone unprepared.

Trail signs are better with funny faces.


2) I assigned gear lists
I'm a list keeper. When we booked this trip, I sent them my copy of lists from previous hiking trips to show them the gear they would need. Good news is they didn't have to buy a lot more, but I knew before I sent the the lists what they were missing. I made sure everyone had their own pack and water. We addressed clothing to bring like jackets, convertible pants, HATS! For the love of god always hike with a hat! There was even a first-aid briefing so at least each pair of hikers had basic items for blister care.

We also discovered we are a family who loves puzzles.

3) I listened to their needs
After the first hike, I learned a lot. I hurried us on a 5 mile hike in mid-afternoon in the crowds and heat. We did not perform well. My husband's pace was too fast for the group, my mom liked to break at different points than me, and my sister wanted lots of photos. At the end of the hike we were exhausted in more than one way and it was just day one. I was worried the entire vacation was going to already be a bust.

So at dinner time, we talked it over. I asked how they felt on the hike and what they wanted to change. When we hiked as a family again on Day 3, we made lots of changes. I became line leader as my pace was the right balance. I made sure to stop at the bottom and top of hills, instead of just the top like I was use to.  We communicated more about stopping for photos or changing pace. It was a much better hike!


Hiking with family presents a new set of challenges, but it was rewarding to share the memories together after the trip. Don't get a few bumps prevent you from the same!

Tuesday, February 9, 2016

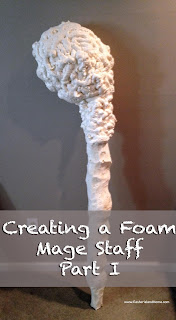
Expanding Foam and You: Creating a Mage Staff with Expanding Foam

Do you sense a theme with my latest cosplay posts? That would be prop making. I like to pick one things I want to learn that year and commit to making cosplays that help me learn it. Last year, it was props so I can now share what I have learned with the masses!

expanding foam cosplay mage staff how to


My big prop last year (literally!) was a mage's staff. After lots of research, the best material choice for me to follow my three tenets of prop making was going to be expanding foam. Two tutorials sold me on the idea:

Each project is different so while these served as good guides for me, I still ran into unique issues I had to battle. 

I nailed the first step to create my prop core and outline. 

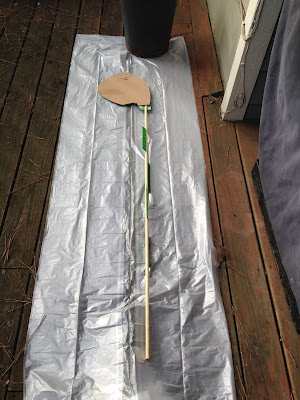
I got a wood pole from Home Depot to serve as the core for the staff and drew a lot on a piece of craft foam until I found the approximate size and shape of the staff head. I would constantly hold the piece up to myself in a mirror to ensure I liked the scale. (Note: There are a lot of tutorials about using a lot of math to scale props online. At the end of the day, I go with what looks right on me.)


 I went outside with a tarp to start step 2-- attaching foam to my core. 
expanding foam cosplay mage staff how to
Expanding foam should be handled with care. Lay down a tarp to protect surfaces and be sure to wear at gloves to protect your skin. Outside application is best for large amounts because you will want the ventilation. 

Look Ma! I even made some guides to 1) help give the foam something to attach to and 2) give me a stopping point in carving.
 From my handy dandy sketch, I knew I wanted the staff to have an approximately two inch diameter. I cut and hot glued on foam pieces that are two inches. When carving, if I saw green I would know I have gone far enough. 

You'll see most people use cardboard in other tutorials. I chose craft foam because it was easier for me to see and glue to my core. I was cutting a lot of pieces out and craft foam is way easier for that than cardboard. 

The expanding foam quickly rebelled against me. 
expanding foam cosplay mage staff how to
You see, it is very sticky when it meets cloth or plastic. It does not like to stick to itself after a certain point. The foam would start to build, then slide off the pole as it settled. After one bottle of foam, I was left with a half-covered mess of a staff. 

The solution was more cowbell and more guides. I hot glued craft foam everywhere to create 'V' channels the the foam could rest in.
expanding foam cosplay mage staff how to
Now I'm guessing you could also show more patience than me and wait for a smaller amount of foam to dry before applying the next.  However, this method totally worked. Sometimes I would jam a piece of craft foam between hunks of expanding foam - no glue needed. 

It still took several layers and some patience to create the necessary bulk on the staff.
expanding foam cosplay mage staff how to
The good thing about bright green guides is I knew to cover the staff until they were not visible. If I could see them or guess where they are, I would add more foam. 

It took between 3-4 bottles of foam to create the staff. Or rather the hunk of foam that would become the staff.  Next post will be about the carving and covering process!
expanding foam cosplay mage staff how to


Part II is live! Click here to ead the next steps.